Pastry
French Pastry Pie Crust

- 1 ¼ cups (160g) all-purpose flour
- ½ cup (115g) unsalted butter, cold and cubed
- 1 tsp granulated sugar (optional for a slightly sweet crust)
- ¼ tsp salt
- ¼ cup (60ml) ice-cold water (more if needed)
- 1 egg yolk (optional, for a richer dough)
Instructions:
- Prepare the Ingredients:
- Ensure the butter is very cold before starting, as this helps create a flaky crust. You can even chill the flour for 10 minutes before using it. Have your ice-cold water ready.
- Mix the Dry Ingredients:
- In a large mixing bowl, whisk together the flour, sugar (if using), and salt. The sugar is optional, depending on whether you’re making a sweet or savory pie.
- Cut in the Butter:
- Add the cold butter cubes to the flour mixture. Using a pastry cutter, a fork, or your fingers, cut the butter into the flour until the mixture resembles coarse crumbs with some pea-sized pieces of butter remaining. Work quickly so the butter stays cold.
- If using your hands, avoid handling the dough too much, as the warmth of your fingers can soften the butter.
- Add the Water:
- Gradually add the ice-cold water, one tablespoon at a time, mixing gently with a fork after each addition. You want to add just enough water for the dough to come together when pressed, but it should not be sticky.
- If you’re using the optional egg yolk, whisk it into the water before adding it to the dough. This will give the dough extra richness and color.
- Form the Dough:
- Once the dough begins to hold together, gather it into a ball. Be careful not to overwork the dough; you want it to remain tender and flaky.
- Flatten the dough into a disc, wrap it in plastic wrap, and refrigerate for at least 30 minutes. This resting period allows the gluten to relax and the butter to firm up again, resulting in a more tender crust.
- Roll Out the Dough:
- On a lightly floured surface, roll out the chilled dough to fit your pie dish, making sure to rotate the dough as you roll to maintain an even thickness. The dough should be about 1/8 inch thick.
- Transfer and Shape the Dough:
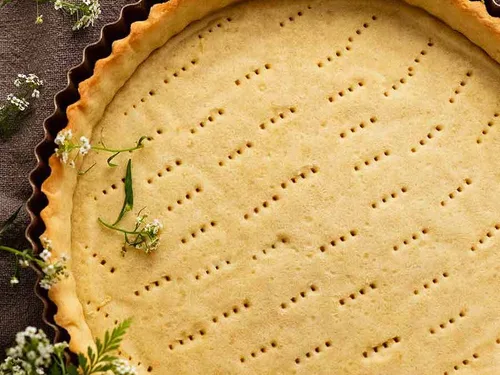
- Carefully transfer the rolled-out dough to your pie dish. Press it gently into the edges of the dish and trim any excess overhanging dough.
- If desired, crimp or flute the edges for a decorative finish.
- Chill Again:
- For the best results, chill the shaped dough in the pie dish for another 15-20 minutes before filling or baking. This helps the dough hold its shape and prevents shrinkage during baking.
Tips:
- For a blind-baked crust, preheat the oven to 375°F (190°C), line the dough with parchment paper, and fill it with pie weights or dried beans. Bake for 15-20 minutes, remove the weights, and bake for another 5-7 minutes until golden brown.
This French pastry pie crust (pâte brisée) is versatile and works beautifully with both sweet and savory pies!

Pastry
Spooktacular Snack: Nutella Banana Mummy Rolls the Perfect Treat for Halloween!

Ingredients:
– 1 can of Flaky Pastry Sheets
– 1 jar of Chocolate Hazelnut Spread
– 2-3 ripe bananas
– 1/2 cup of sifted confectioners’ sugar
– A splash of milk or water for the sweet drizzle
– Edible candy eyes for decoration
Instructions:
- Preheat your oven to 190°C (375°F) to warm up for the baking adventure.
- Lay out your pastry sheets on a cutting board, stretching them to about 25-28 cm x 15-20 cm.
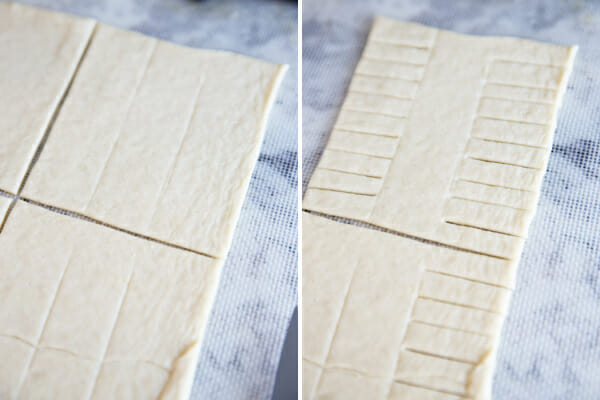
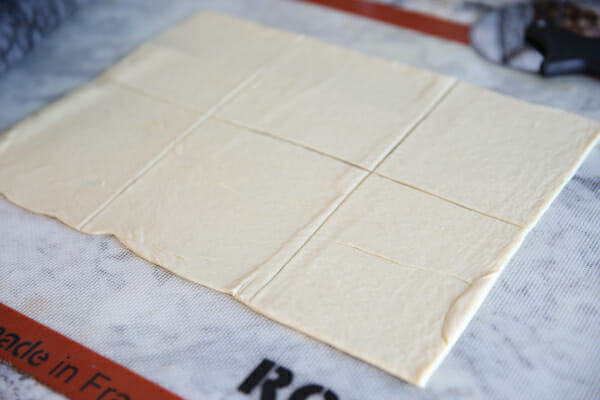
- Divide the sheet into six squares large enough to wrap a secret treasure inside.
- Carve out the pastry square’s fate by scoring it into thirds, only whispering your intentions to the dough with your knife.
- Cut parallel strips, roughly 0.6 cm wide, along the outer thirds of your square – these will soon become the wrappings of your Chocolate Banana Pharaoh.
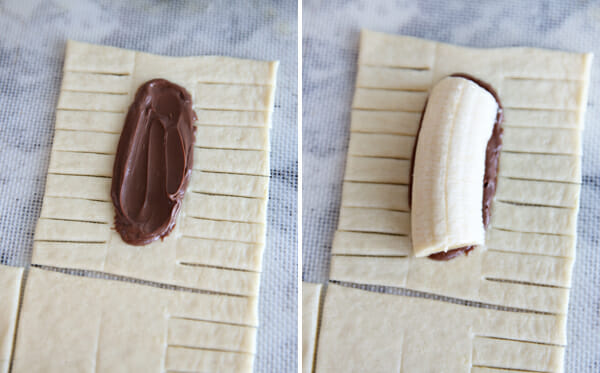
- In the center aisle, lay a generous helping of chocolate hazelnut spread, avoiding the very top and bottom like a pharaoh avoids the common cold, then crown it with a section of banana.
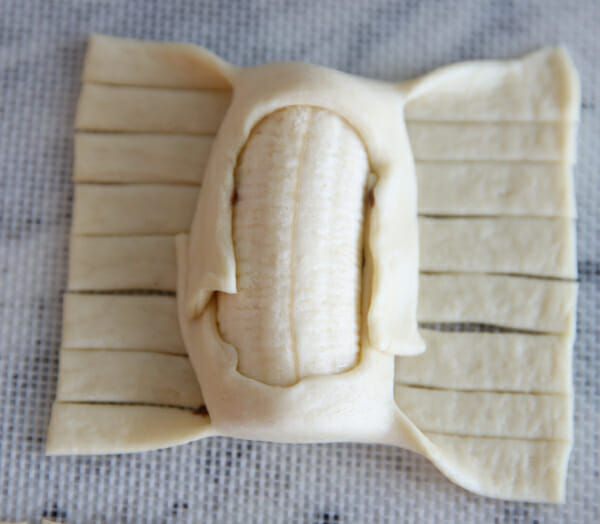
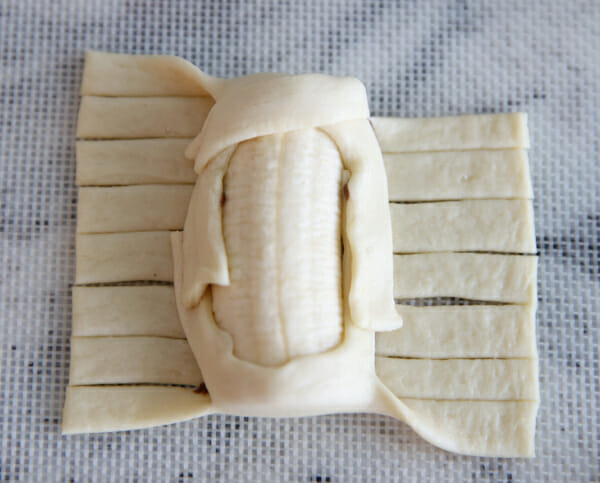
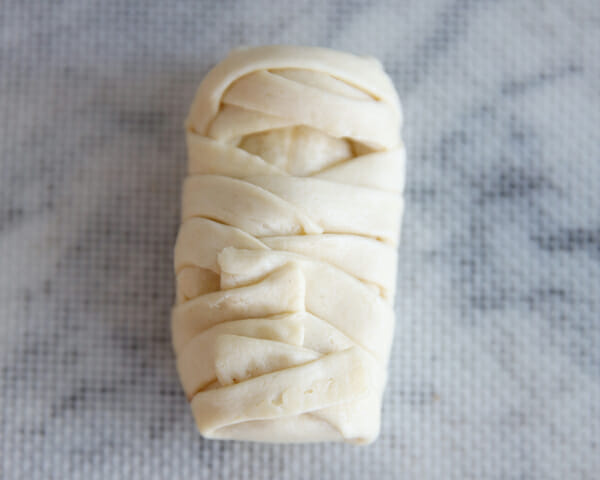
- Begin the enchantment by folding the rightmost pastry strips over the center, followed by their opposing brethren, alternating each side to create a wrapped spectacle, leaving a small window for the eyes to peer through.
- Carefully transfer your soon-to-be entombed treats to a baking sheet lined with parchment for an easy escape after baking.
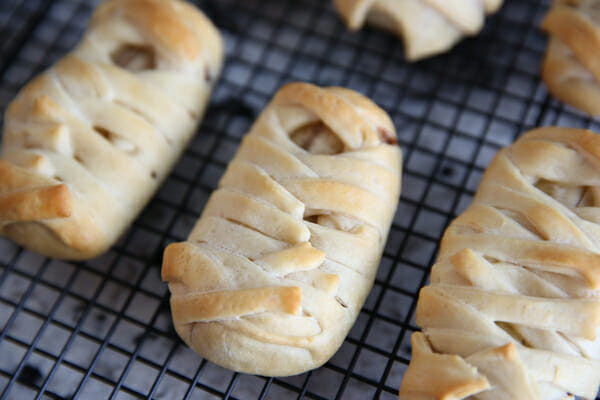
- Allow them to bake in the preheated oven until they take on the color of golden twilight – this should take about 12-15 minutes, but trust your eyes.
- Once they’ve had their fill of heat and have cooled to the touch of ancient stone, it’s time to anoint them with a drizzle.
- Mix the confectioners’ sugar with just enough milk or water to create a glaze worthy of the gods – it should be pourable yet thick, like the Nile.
- Summon your inner artist and drizzle the glaze over your Pharaoh wraps in an ornate fashion. Patience – allow the sweet offering to become one with the pastry.
- Finally, give life to your creation by affixing the candy eyes to their rightful place with a dab of glaze or chocolate.
Serve your Chocolate Banana Pharaoh Wraps at room temperature to hungry souls daring enough to disturb the Pharaoh’s slumber. Makes 6 servings – or more, should your dynasty demand.

The debut of Pillsbury’s crescent dough sheets was a true game changer for baking enthusiasts like me; they’re a dream come true for creative culinary undertakings. Should you prefer the authenticity of kneading your own bread dough or another type of pastry foundation, I wholeheartedly encourage you to embrace that artisanal spirit!
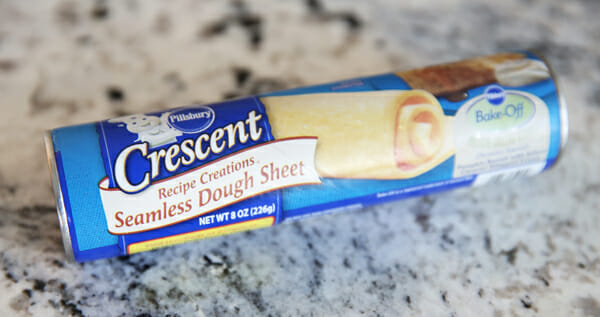
Gently extend the crescent dough by rolling it out just enough to give it some elasticity, then divide it into six sections similar to the image I’ve showcased. Precision isn’t paramount in this step (which is rather fortunate as my original measurements were hastily scribbled on a kitchen napkin that has since vanished into the abyss of my culinary workspace…). If I recall correctly, each square was approximately 3 1/2 x 4 inches, give or take a smidge.
Pastry
Baked Camembert Wreath

A baked Camembert wreath is a beautiful and delicious appetizer perfect for sharing at parties, especially during the holiday season. It combines the creamy goodness of melted Camembert with soft, golden bread, making it an irresistible centerpiece. This recipe is simple to prepare, looks impressive, and can be customized with your favorite herbs and toppings.

camembert bread wreath
Ingredients:
- 1 wheel of Camembert cheese (around 8 oz)
- 1 can of refrigerated pizza or crescent dough (about 12 oz)
- 2 tablespoons olive oil or melted butter
- 2 garlic cloves, minced
- Fresh rosemary or thyme sprigs (about 2 tablespoons chopped)
- 1 tablespoon honey (optional)
- Salt and pepper to taste
- Optional toppings: cranberries, walnuts, or chopped nuts for garnish
Instructions:
1. Preheat the Oven
Preheat your oven to 375°F (190°C). Line a baking tray with parchment paper to prevent sticking.
2. Prepare the Dough
Unroll the refrigerated pizza or crescent dough onto a clean surface. If you’re using crescent dough, press together any perforated edges to form one smooth sheet. Cut the dough into small strips, about 4-5 inches long and 1 inch wide. These will form the wreath around the Camembert.
3. Arrange the Dough in a Wreath Shape
On your prepared baking tray, place the wheel of Camembert in the center. Then, begin arranging the dough strips in a circle around the cheese, overlapping slightly at the ends. Leave enough space between the dough and the cheese so that both can bake evenly. The dough should form a ring or wreath shape around the Camembert.
4. Season the Wreath
In a small bowl, mix the olive oil (or melted butter) with the minced garlic and chopped fresh herbs like rosemary or thyme. Brush this mixture generously over the dough strips, ensuring each piece is coated. Season the dough lightly with salt and pepper.
5. Bake the Wreath
Place the baking tray in the preheated oven and bake for 15-20 minutes, or until the dough is golden brown and the Camembert is soft and gooey in the center. Check the cheese around the 15-minute mark to ensure it’s not overcooking.
6. Add Finishing Touches
Once out of the oven, drizzle the baked Camembert with honey for a sweet contrast (if using). You can also sprinkle the wreath with dried cranberries, chopped nuts, or extra herbs for a festive touch.
7. Serve and Enjoy
Serve the baked Camembert wreath warm, letting guests tear off pieces of the golden dough to dip into the melted cheese. It’s perfect for sharing as an appetizer or snack.
Tips:
- Customize the filling: You can slice open the top of the Camembert and add garlic, herbs, or even a spoonful of chutney before baking for extra flavor.
- Make ahead: Assemble the dough wreath around the Camembert and refrigerate until you’re ready to bake, then pop it in the oven for a quick appetizer.
This baked Camembert wreath is sure to impress with its presentation and delicious flavor. Perfect for any festive gathering or dinner party!
Pastry
Practical Sourdough Bread Recipe
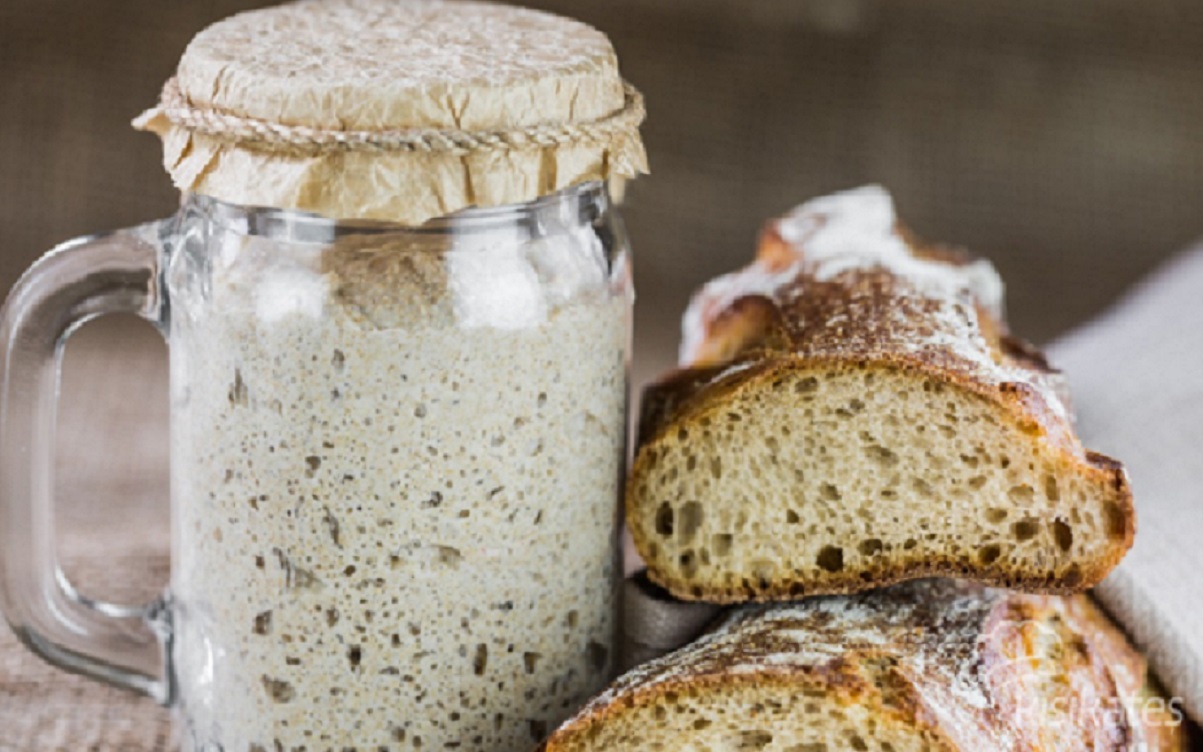
Sourdough bread is known for its tangy flavor, chewy texture, and crispy crust. While it may seem intimidating, this practical recipe will simplify the process and allow you to make delicious homemade sourdough with minimal effort. Using a sourdough starter, flour, water, and salt, this recipe is perfect for beginners who want to enjoy fresh, homemade bread.
Ingredients:
- 1/4 cup sourdough starter (active and bubbly)
- 1 1/4 cups water (room temperature)
- 3 cups all-purpose or bread flour
- 1 1/2 teaspoons salt
Instructions:
1. Prepare the dough
In a large mixing bowl, combine the sourdough starter and water. Stir well until the starter is dissolved. Gradually add the flour and salt, mixing with a spoon or your hands until the dough forms a rough ball. The dough will be sticky and shaggy, but that’s perfectly fine. Let it rest for 30 minutes to allow the flour to absorb the water.
2. Knead the dough
After the dough has rested, knead it for 5-10 minutes on a lightly floured surface. You don’t need to knead as vigorously as traditional bread dough; just fold the dough over itself and press gently. Once the dough becomes smoother and more elastic, shape it into a ball and place it back in the bowl.
3. Bulk fermentation
Cover the bowl with a clean kitchen towel or plastic wrap and let the dough ferment at room temperature for 4-6 hours, or until it has doubled in size. The fermentation time will vary depending on the temperature of your kitchen. Warmer kitchens will speed up the process, while cooler temperatures may require a longer rise.
4. Shape the dough
Once the dough has risen, gently punch it down to release excess air. Transfer it to a lightly floured surface, shape it into a round or oval loaf, and place it in a floured proofing basket or a bowl lined with a kitchen towel. Cover and let it rest for another 1-2 hours.
5. Bake the bread
Preheat your oven to 450°F (230°C). If you have a Dutch oven, place it in the oven to preheat as well. Once the oven is hot, carefully transfer the dough into the Dutch oven, score the top with a sharp knife, and cover with the lid. Bake for 20 minutes, then remove the lid and bake for another 20-25 minutes, or until the crust is golden brown.
6. Cool and serve
Allow the sourdough bread to cool completely on a wire rack before slicing. Enjoy the tangy flavor, crispy crust, and soft interior with butter, jam, or your favorite toppings!
This practical sourdough bread recipe is easy to follow and delivers fantastic results, making it an excellent choice for bakers of all levels.
-

 Salads1 year ago
5-Minute Dense Bean Salad Recipe
-

 Dinners1 year ago
MasterChef Seafood Paella Recipe
-

 Sauces1 year ago
Chick-fil-A Sauces Recipe
-

 Dinners1 year ago
Easy Garlic Butter Chicken Bites with Creamy Parmesan Pasta
-

 Dinners1 year ago
MasterChef Arancini Balls Recipe
-

 Vegetables1 year ago
Best Ever Guacamole Recipe
-

 Vegetables1 year ago
Practical Roasted Garlic Cauliflower
-

 Breakfast1 year ago
Air Fryer Nachos Recipe

